|
|
CS 422 - Database Programming I
Chapter 2, Introduction to SQL *Plus
Objectives:
This lesson discusses the technical goals of network design and conflicting
goals that lead to tradeoffs. Objectives important to this lesson:
- SQL Introduction and the Oracle Technology Network
- Installing Oracle Express
- Creating a Database User
- Installing SQL Developer
- Unlocking the Sample User Account
- Getting Started with Application Express
- Other Tutorials
Concepts:
Chapter 2 and Online Tutorials
SQL Introduction and the Oracle Technology Network
The text begins with a discussion of SQL (Structured Query Language),
which is a language for creating, managing, and using databases. There
are several versions of SQL, each having its own unique features, but
most use a common set of basic commands. This is due to the history of
the language, in which it was accepted by the American National Standards
Institute (ANSI) and adopted as in international standard by the International
Organization for Standardization (ISO).
SQL *Plus is a version of the language that is automatically installed
with Oracle Database. Pages 2-2 and 2-3 list some functions of SQL *Plus,
pointing out that it can be used by application developers, by database
administrators, and by general users. Page 2-3 also has a basic procedure
for starting the SQL *Plus interface on a Windows workstation. In our
environment, we will install the Oracle Express Database (from the OracleXE112_Win64
zip file download). You can get this download file for your own use by
first creating an account with the Oracle
Technology Network. You must be signed in to their network
to and accept their terms of service, any time you want to download one
of their educational products. So one task for this week is to create
an account, and to download the install package for Oracle 11 Express.
Installing Oracle Express
Repeating essential instruction: you cannot download the tools
we will use from Oracle without signing in to their network first.
Create your account. Your ID should be your student email address,
and your password for the site should be something you can remember.
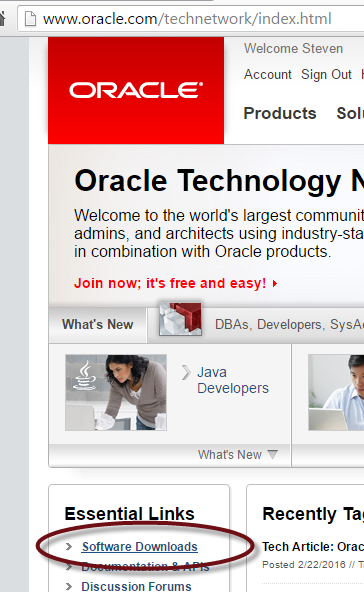
- Once your account is live, sign in to the Oracle Technology Network
site, and select the Software Downloads page, as shown below.
- On the downloads page, scroll to the Database section, and select
Database 11g Express Edition.

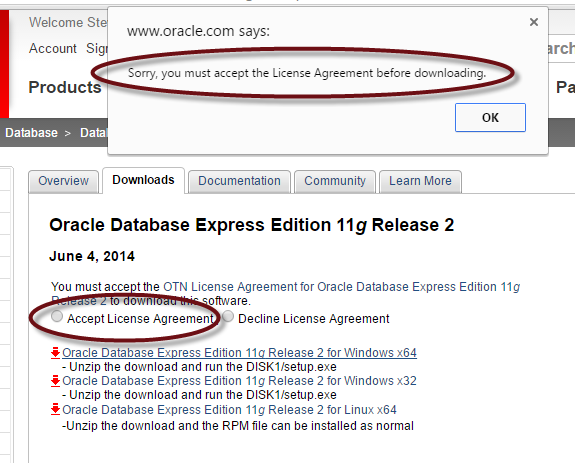
- On the 11g Express page, let's hope we are running a 64 bit version
of Windows. Check that, and select the appropriate download. Note that
they have packages for 32 and 64 bit Windows and for 64 bit Linux. In
the image below, note that I have not clicked the radio button
for Accept License Agreement. The error message this generates is shown
at the top of the image.
Assuming you have downloaded the file, you need to unzip and run it.
During installation you will be asked to assign passwords for two default
accounts in Oracle on your workstation. For simplicity, let's make the
passwords oracle for now. This will install several components
of Oracle 11g, one of which appears in the Windows programs menu as Run
SQL Command Line. Choosing this program will open the SQL *Plus command
line interface. Once you have done this, follow this
link to Oracle's online instruction page for setting up Oracle
on your workstation.
Creating a Database User
Follow the instructions under part 2 on that page: Creating
a Database User. Assuming you have had an SQL course before, you may
be entering a semicolon after you enter connect. That is okay,
but not necessary for this login sequence.
- Enter connect
- Enter system
- Enter the password you assigned, which I told you to set as oracle
This should take you to the command line with administrative rights.
If you receive a TNS Error message, the database service is probably not
started. An effective way to start it on a machine where you have administrative
rights is:
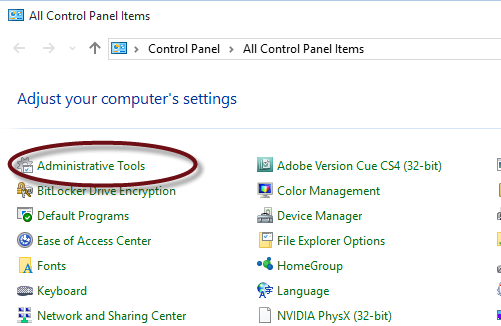
- Open Control Panel, and select Administrative Tools.
The proper selection in Windows 10 is shown below.
- On the Administrative Tools list, double-click Services.

- Find the service called OracleServiceXE. If it is not running, right
click it and select Start.

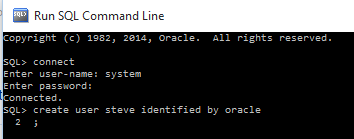
- In the image below, I have started the services, and opened SQL Command
Line.
I have logged in as system, using the password I set when installing
Oracle Express.
I have also created a user based on the name under which I logged
in to Windows. Do this on your workstation, but create the user
ID under which you logged in to Windows. The phrase "identified
by oracle" sets the password for this user to be oracle.
Do it this way for simplicity. This is step 3 in the online lesson,
Creating a Database User.
Note that I did not enter a semicolon at the end of my command,
but pressed Enter instead. This took me to a prompt that said
2. The 2 prompt means that I am on line 2 of a buffered command
that has not been executed yet. To recover from my error, I entered
a semicolon, and pressed Enter.
- It would not be very useful to have a user with no rights on the system.
The online lesson continues by setting several privileges. It is best
at this point to grant all privileges to your user ID, so use the command
grant all privileges to your_ID; (Italics indicate a variable.
You should have logged in as student, but I am being flexible in case
you did not.)
Installing SQL Developer
This takes us to part 3 of the online lesson: Installing SQL
Developer.
- You should exit the SQL Command Line window. Entering the command
exit will do it.
- Follow the link on the online instructions, part 3, instruction 1.
You should go to this
page.
- Click the red download button on that page to be taken to another
page where you can choose the download for your operating system. In
the image below, I am choosing the version for 64 bit Windows that includes
Java Developer Kit 8.
- The instructions are a bit unclear. It appears that you are supposed
to unzip the download to a folder at the root of your C: drive. Call
the folder sqldeveloper.
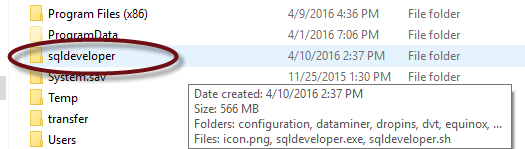
- To run SQL Developer, locate the sqldeveloper.exe file in the
folder you created and double-click it.
Unlocking the Sample User Account
For this exercise, skip down to part 5 of the online instructions.
- Follow instruction set 5.1 to unlock an account that is included
in the installed files. The account is called HR.
- Open the SQL command prompt window.
- Follow the procedure you used in Creating a Database User to
log in as the system user.
- Enter connect
- Enter system
- Enter the system password
- Enter the command: alter user hr account unlock;
- Change the HR user's password. Enter the command: alter user hr
identified by oracle;
(Yes, I am telling you to set the password the same as the others. One
less thing to go wrong,)
- Enter the command: exit
(And note that the exit command does not require a semicolon
to work.)
Getting Started with Application Express
Carry out the instructions under part 6.1, to use the web browser based
Application Express to create a workspace for the HR user.
Other Tutorials
There are several other parts to the online tutorials supplied by Oracle.
Let's try a few in the classroom to see what we can do .
|